
Publishing to Environments
View Environments
Section titled “View Environments”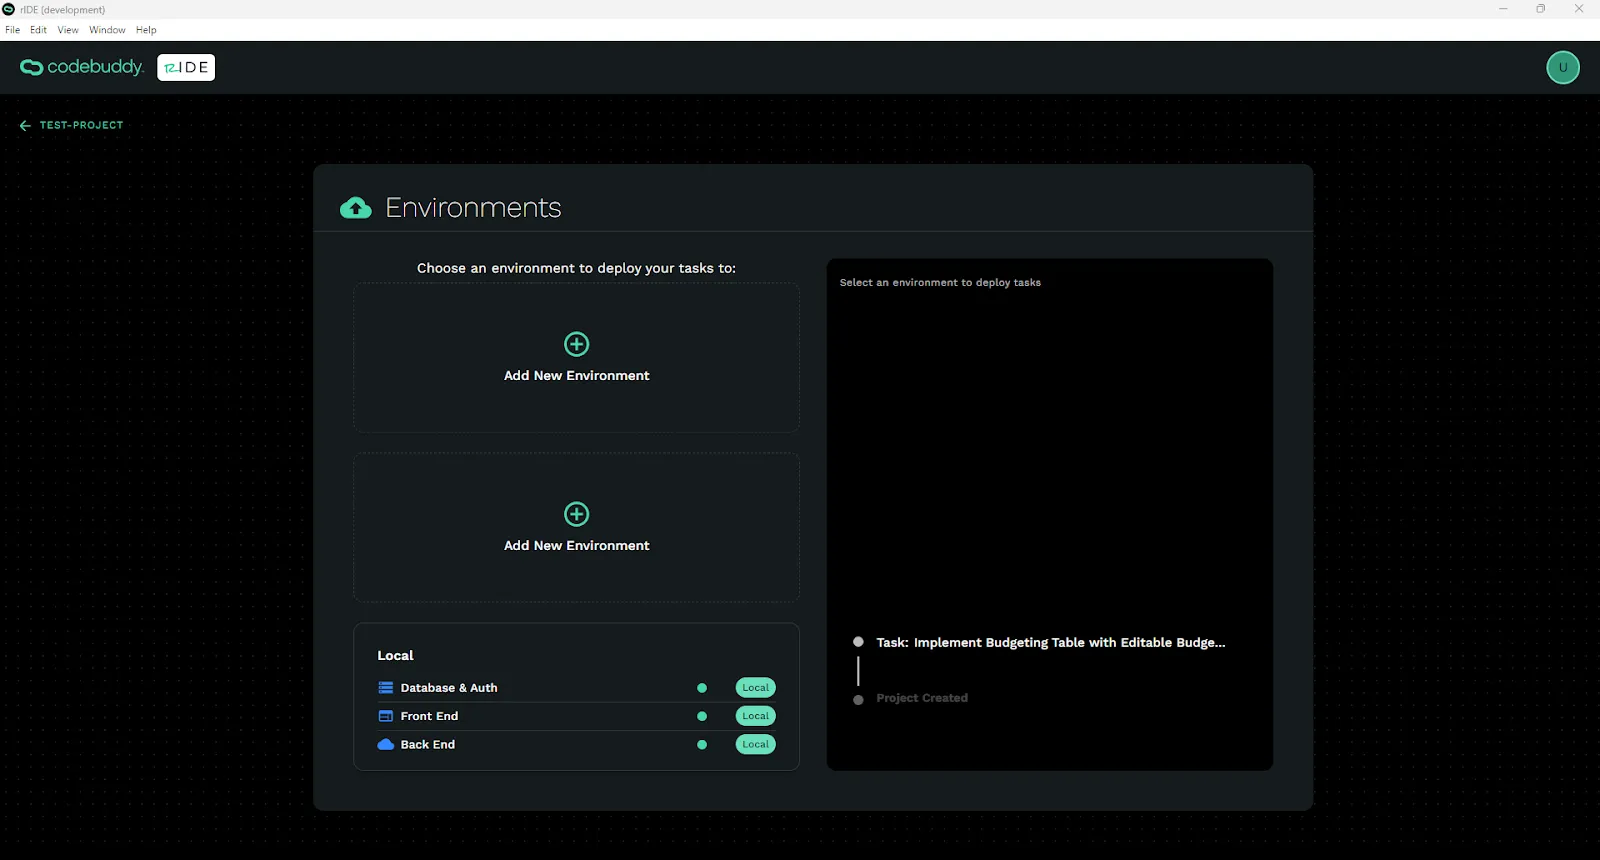
Add a New Environment
Section titled “Add a New Environment”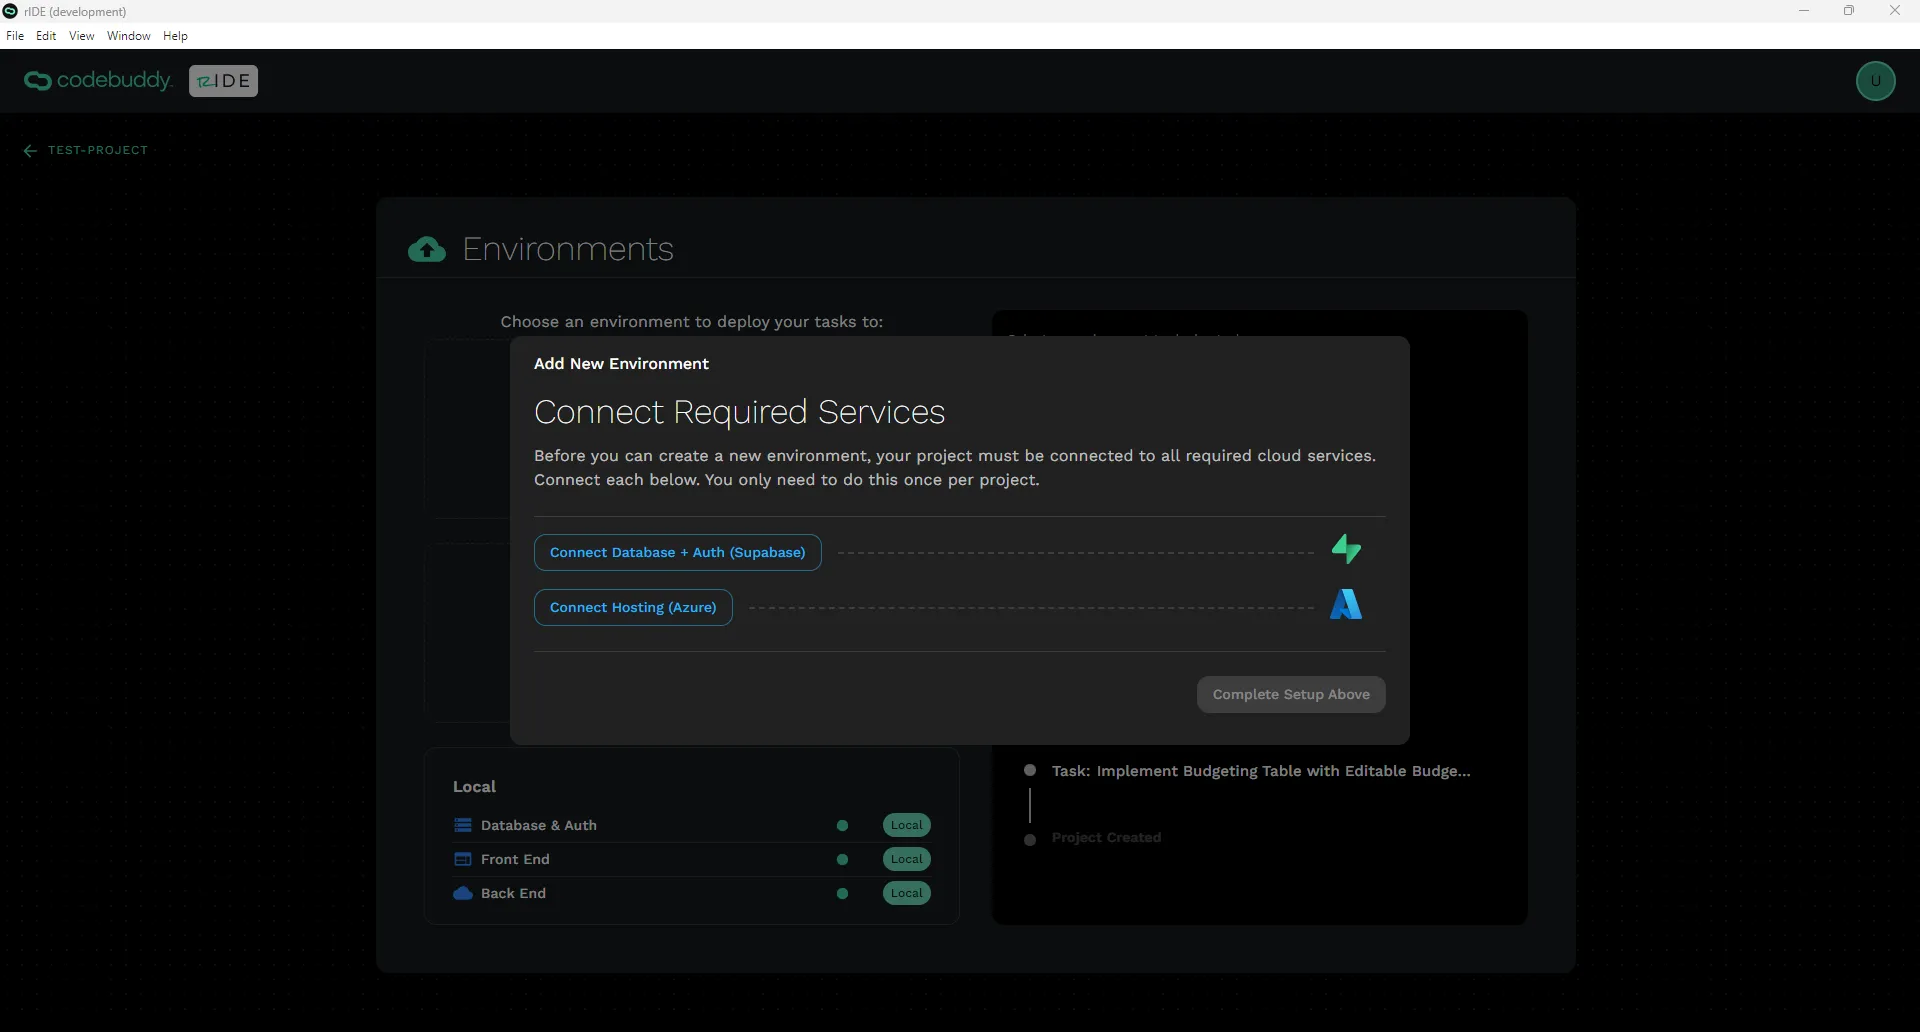
Click the Add New Environment button.
Connect Required Cloud Services
Section titled “Connect Required Cloud Services”Connect Source Control
Section titled “Connect Source Control”CodeBuddy hosts its own Git version control management so that we properly version your app. We will automatically create new sessions for each of your new tasks and merge those sessions when complete. Your repository will always be available locally. If you ever need access to it via our Git repository, please contact support@codebuddy.com.
Connect Supabase
Section titled “Connect Supabase”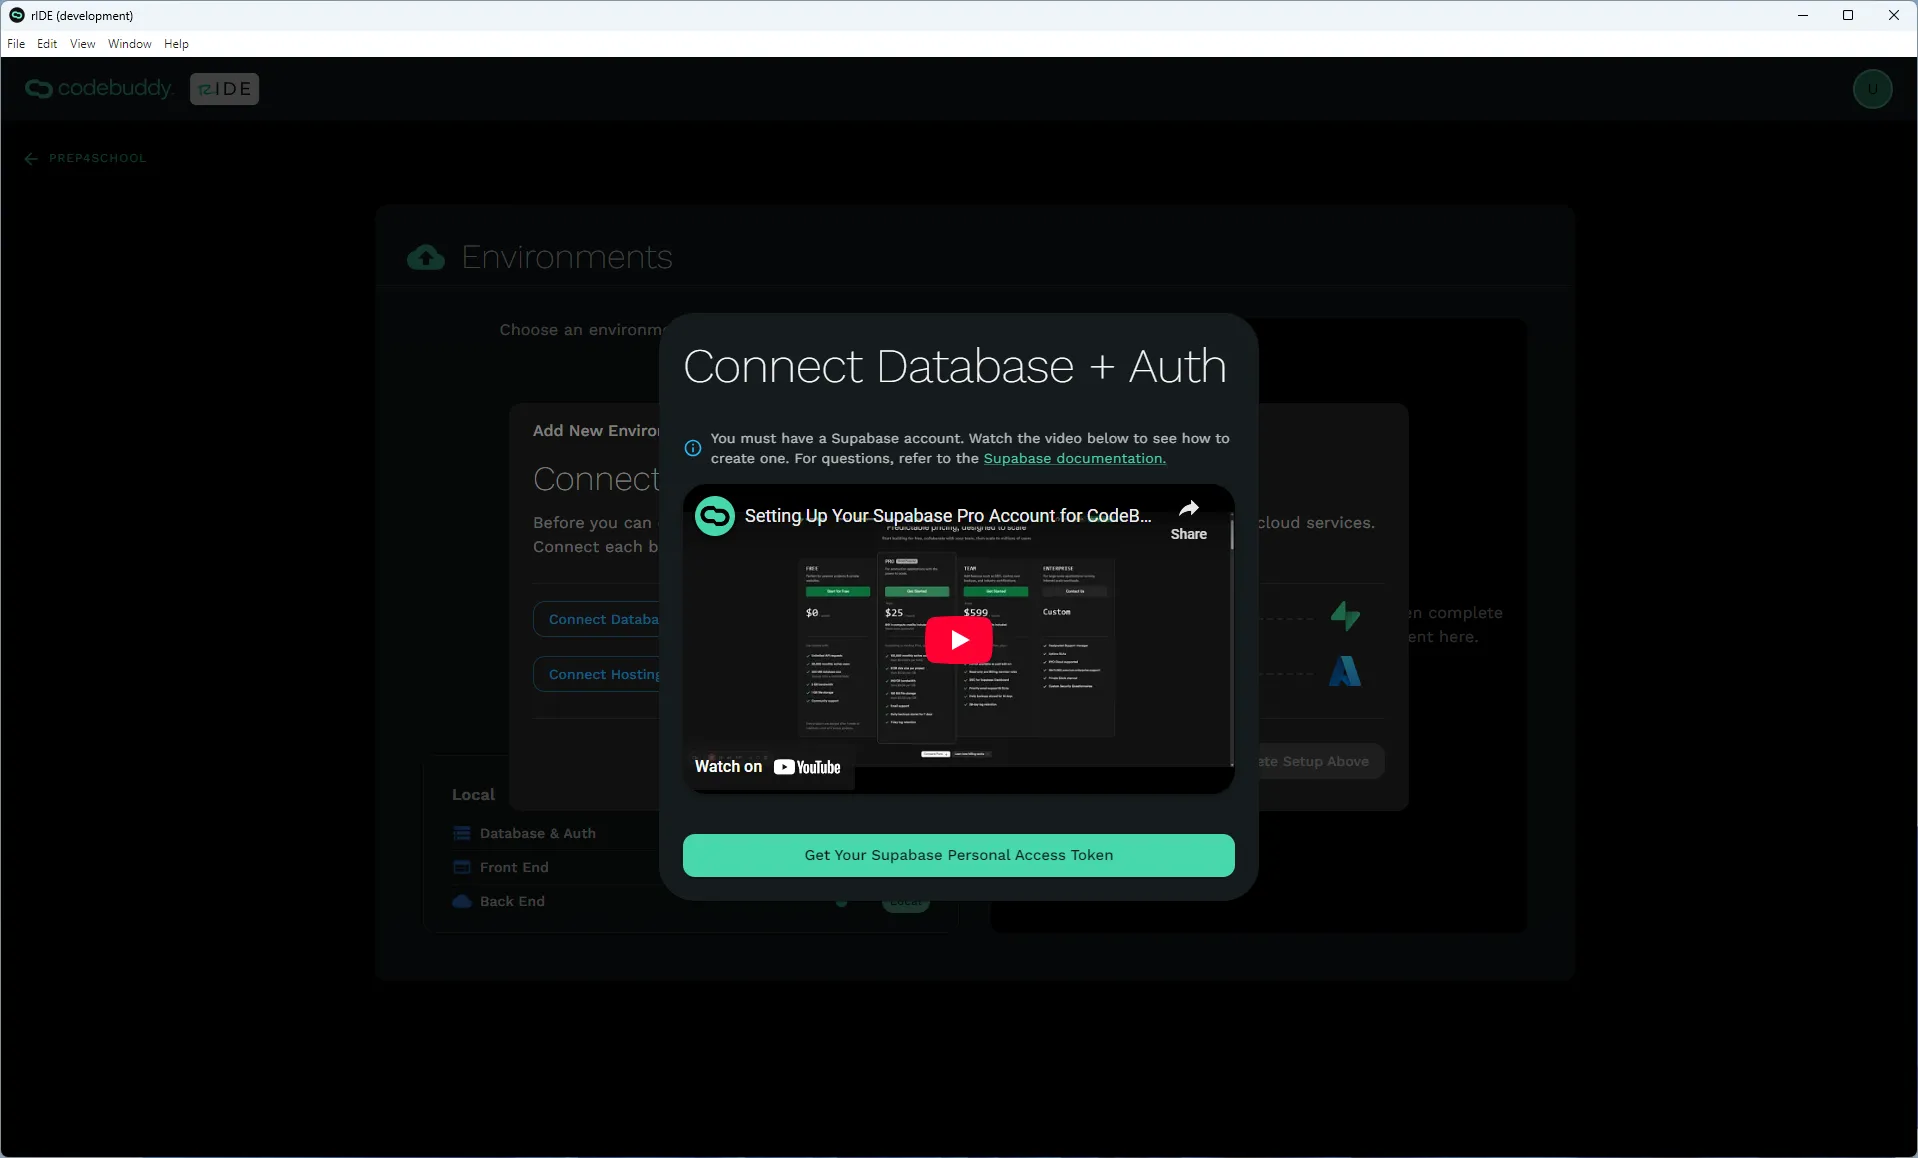
CodeBuddy uses Supabase to provide Authentication for your app (Login, User Management) as well as Database and Blob/Bucket Storage.
You can utilize up to two environments with a Free Tier Supabase account ($0/m). After that you will need a Pro Account ($25/m).
To signup for a Supabase account, click here: Supabase. You will save money by signing up as a Free tier account but you will have to upgrade after you create your two free hosted environments.
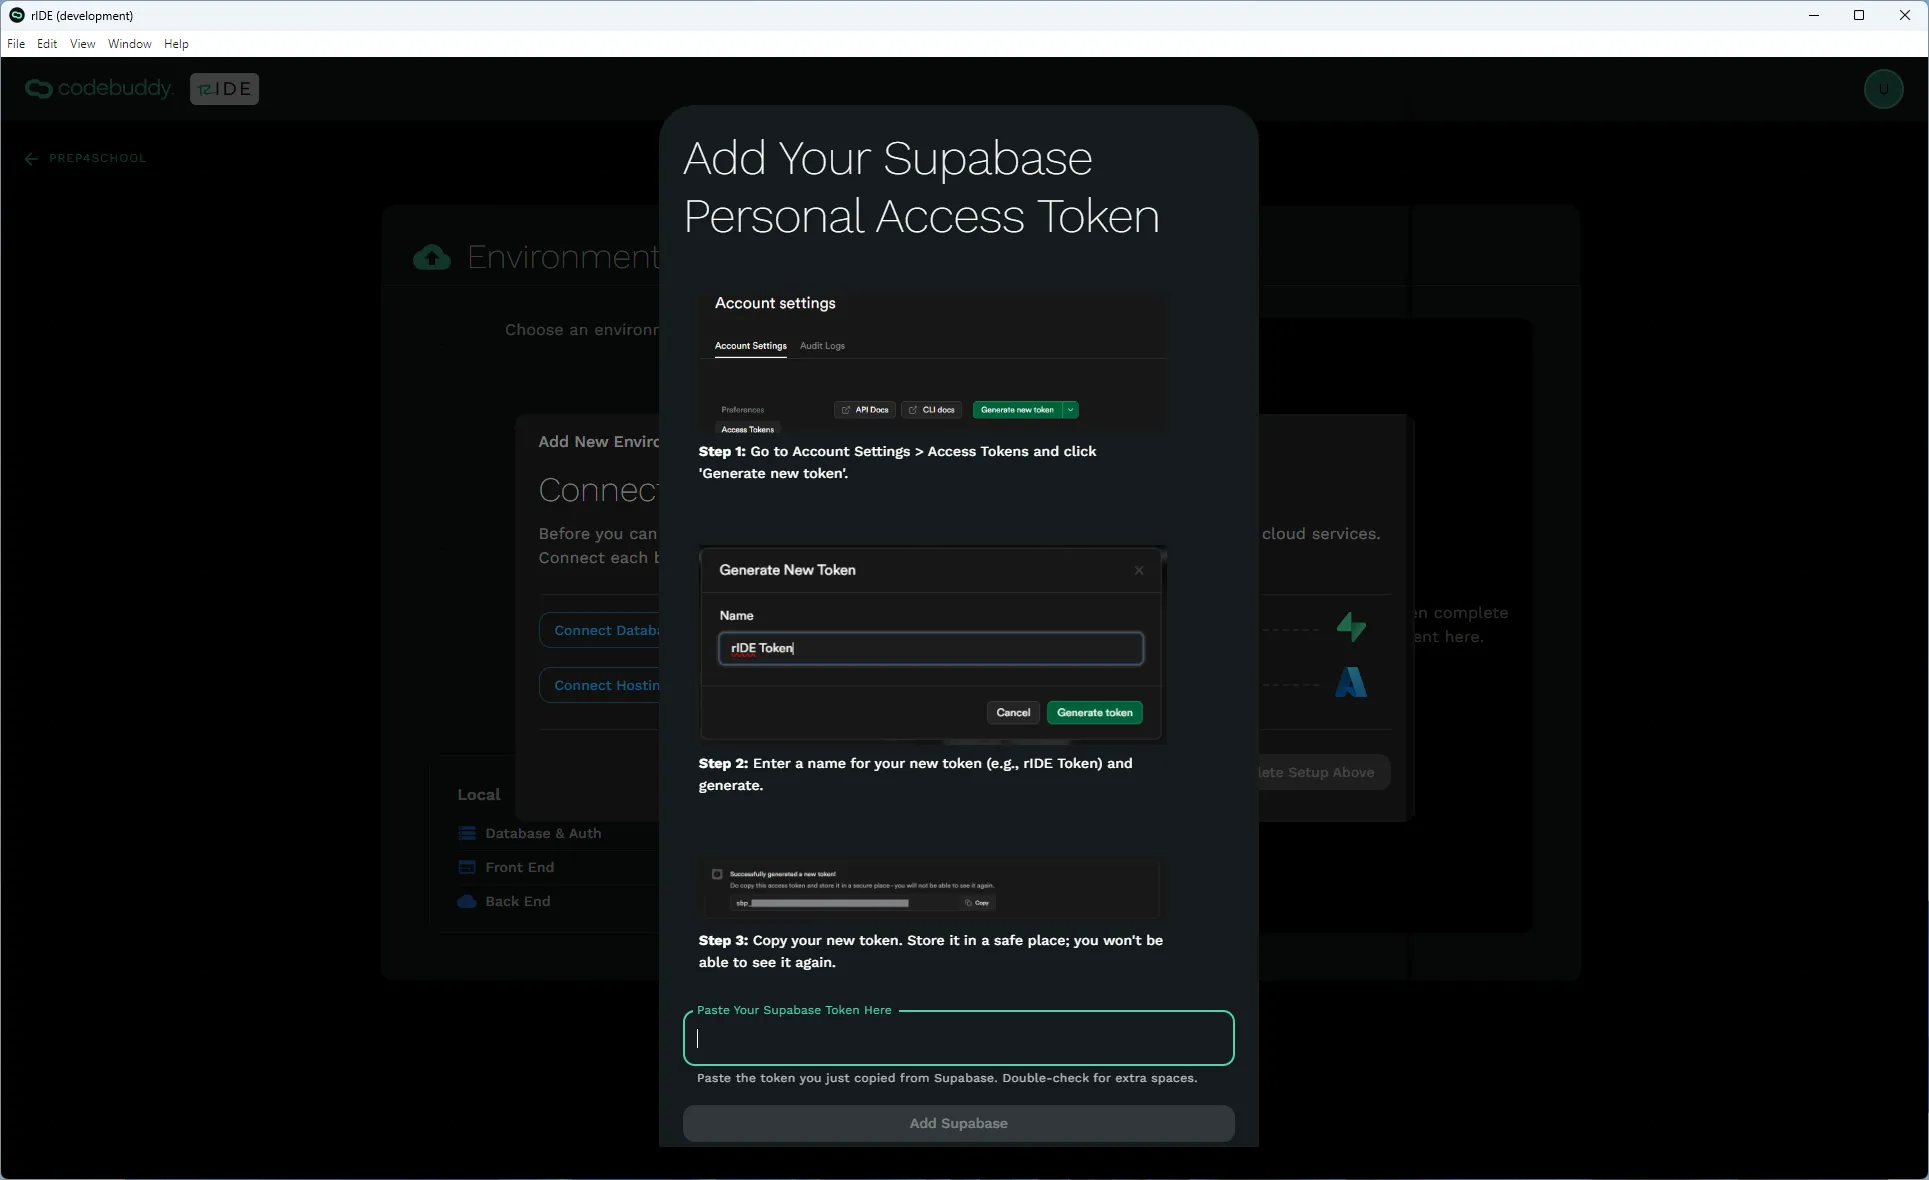
To connect your Supabase, click Get Your Supabase Personal Access Token.
You can find this token, by navigating to your Supabase page and clicking on your account avatar in the top right -> Account preferences -> Account Settings -> Access Tokens. Click on Generate a new token and give it a name. Close Supabase and store the token in the rIDE dialog. If you need to open the dialog again just click Get Your Supabase Personal Access Token.
NOTE: Store your token someplace secure since you cannot access it again and don’t forget to sign up to a Pro account if you have more than two hosted environments on rIDE.
Connect Azure
Section titled “Connect Azure”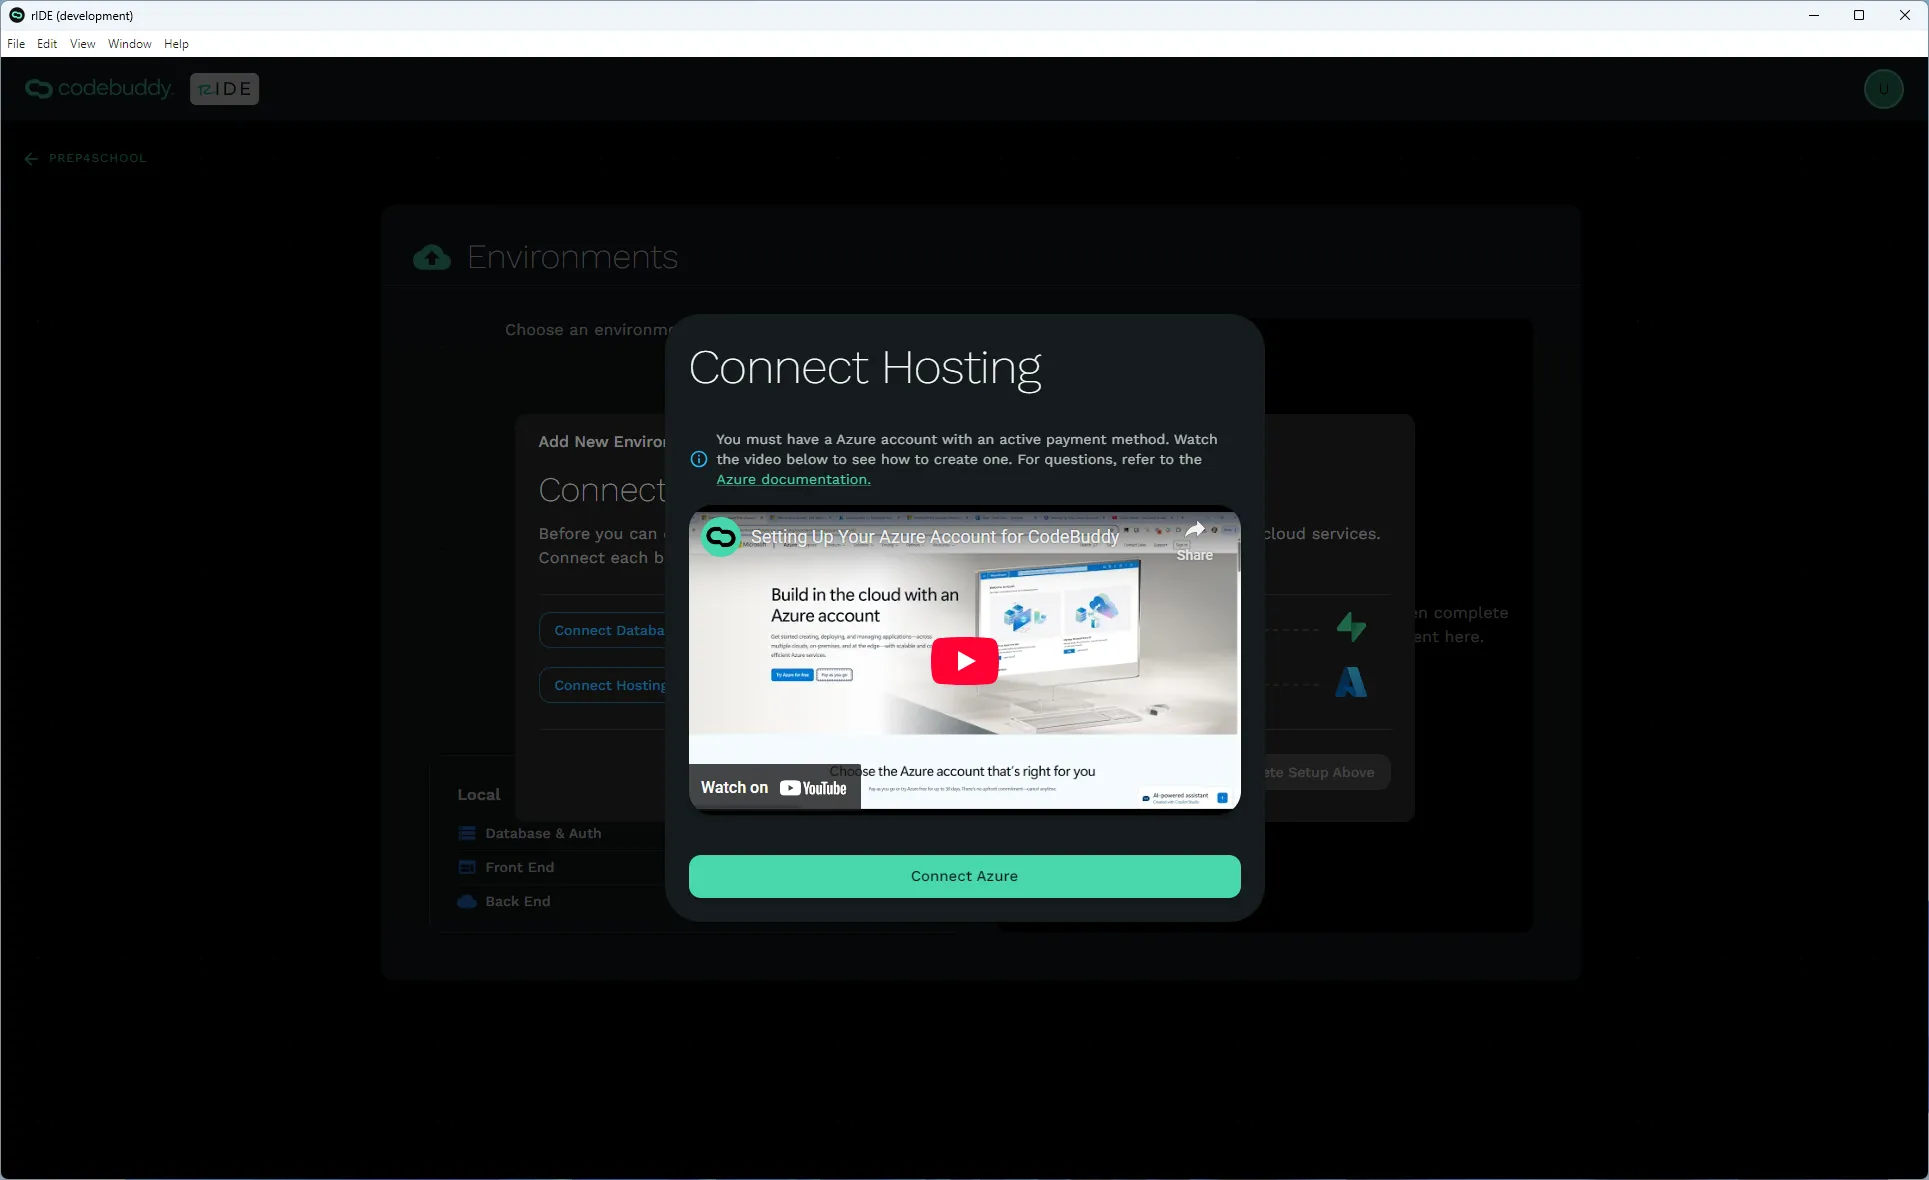
Click Connect Azure. Azure portal will open in a dialog window and will prompt you to login. Once you login it will close the window or you can exit out of the window and then select your Azure Subscription.
NOTE: If you are publishing software to an Azure account that you did not setup, you will need to be sure to connect with an account that is added to that Azure Account Entra Id as an @[yourazure].onmicrsoft.com New User (Member) alias. Instruction below.
Connect rIDE to Another User’s Azure Account
Section titled “Connect rIDE to Another User’s Azure Account”To connect rIDE with an Azure Account that you did not create with your email, you’ll need to have the person who created the Azure account add you as an internal User to their Microsoft Entra account.
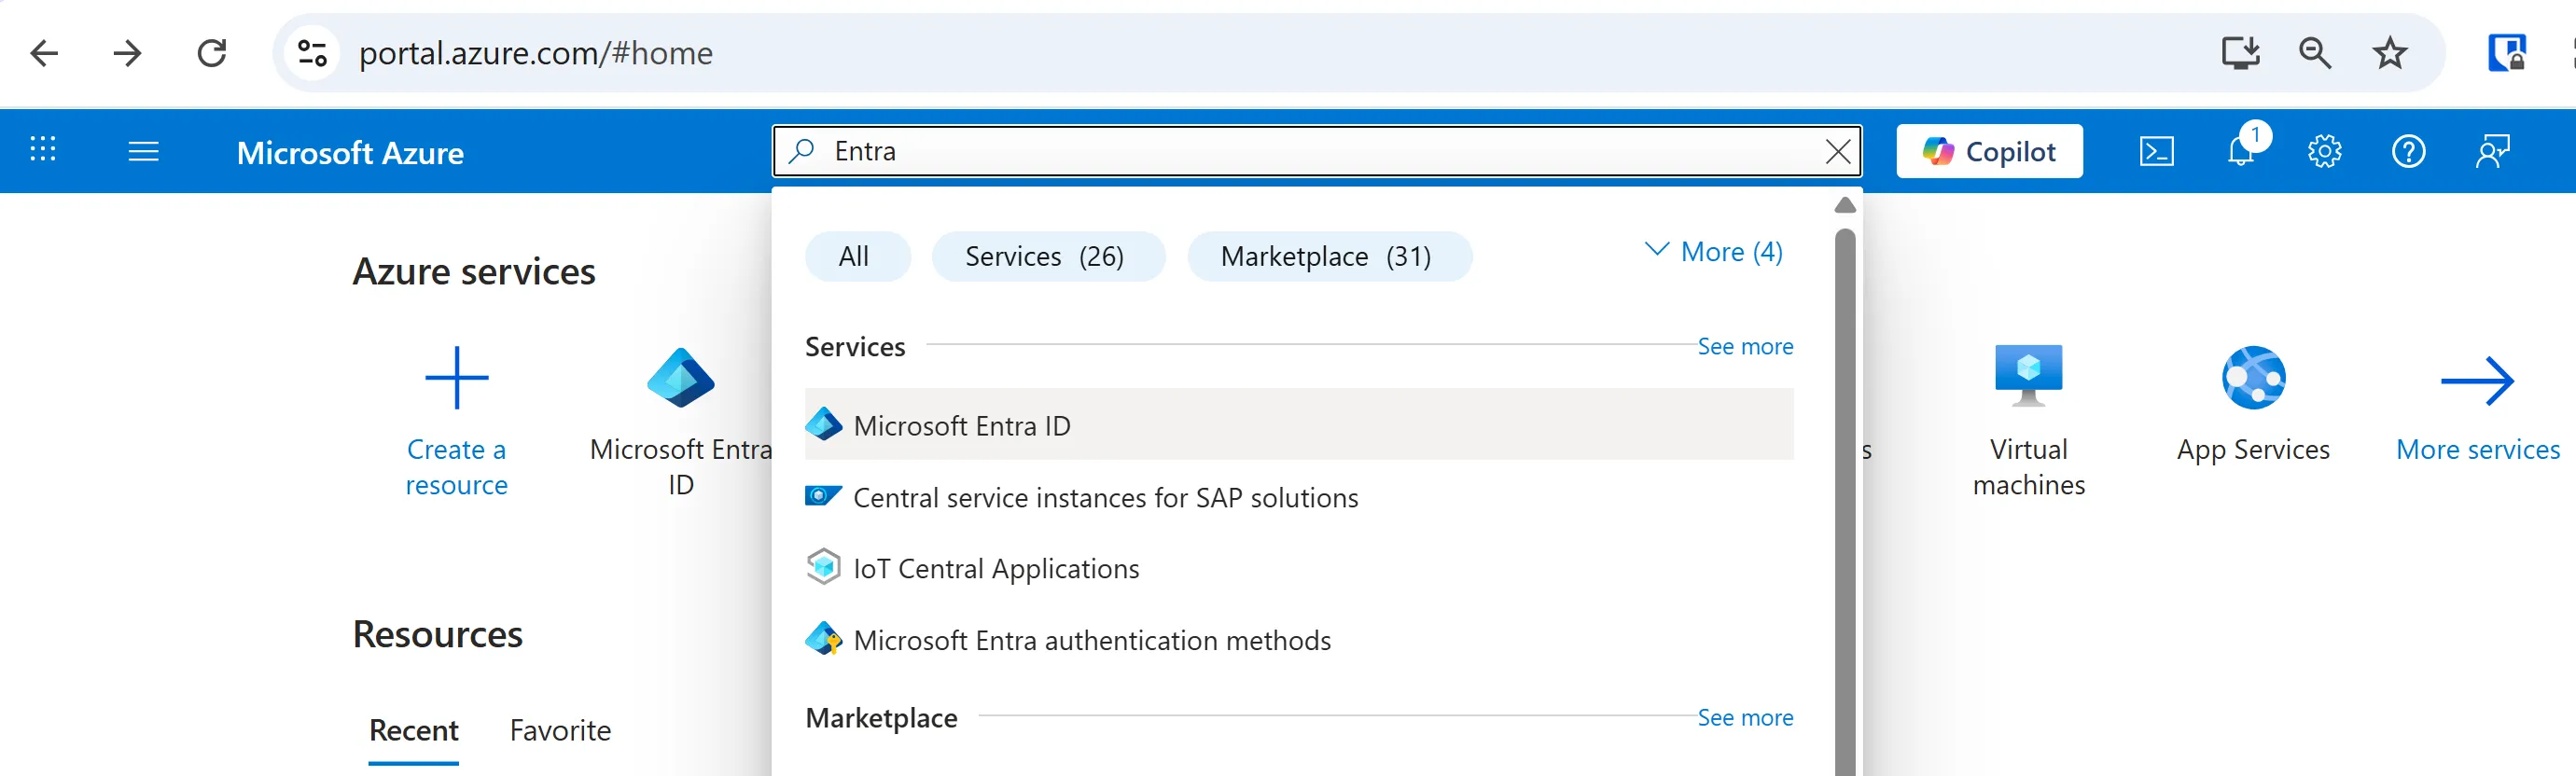
Instruct whoever setup the Azure account to login to the intended Azure portal (portal.azure.com). Seach Entra and the search bar and click on Microsoft Entra.

Click on the + Add button in your Azure Entra Overview and select User -> Create new user.
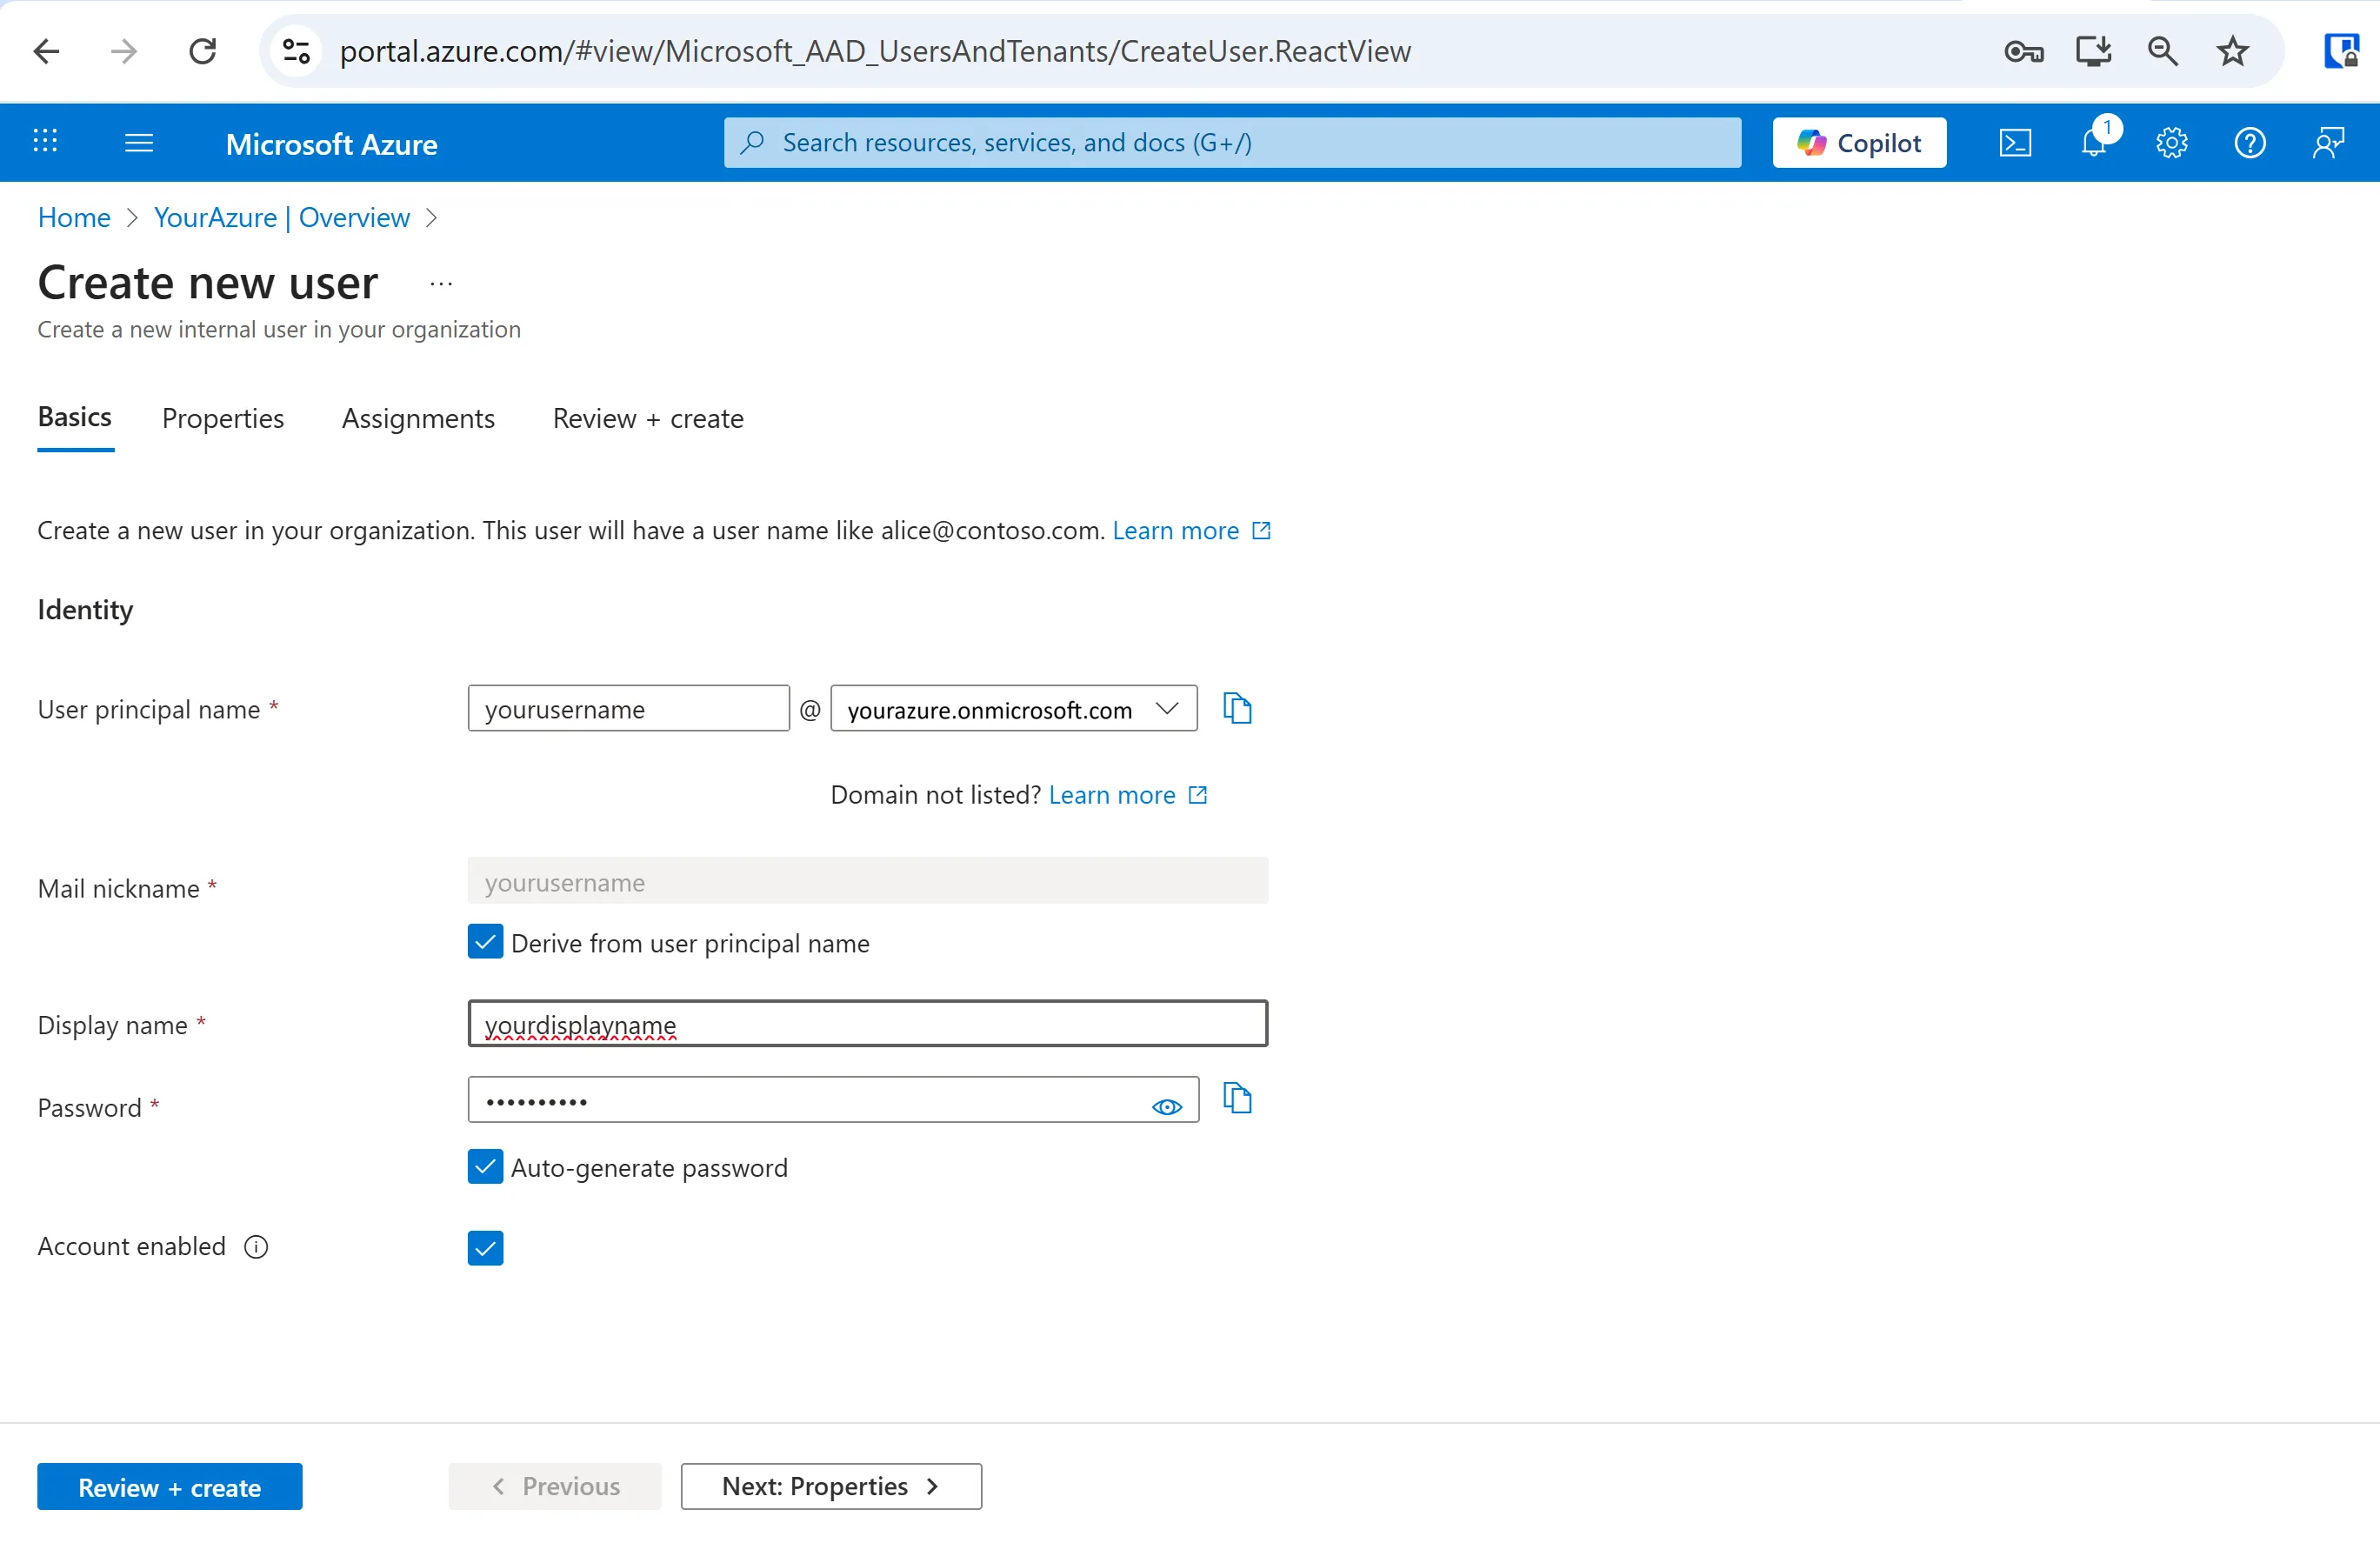
Fill in your user and display name. Set a passsowrd. You’ll want to make sure the email ends in @[yourazure].onmicrosoft.com.
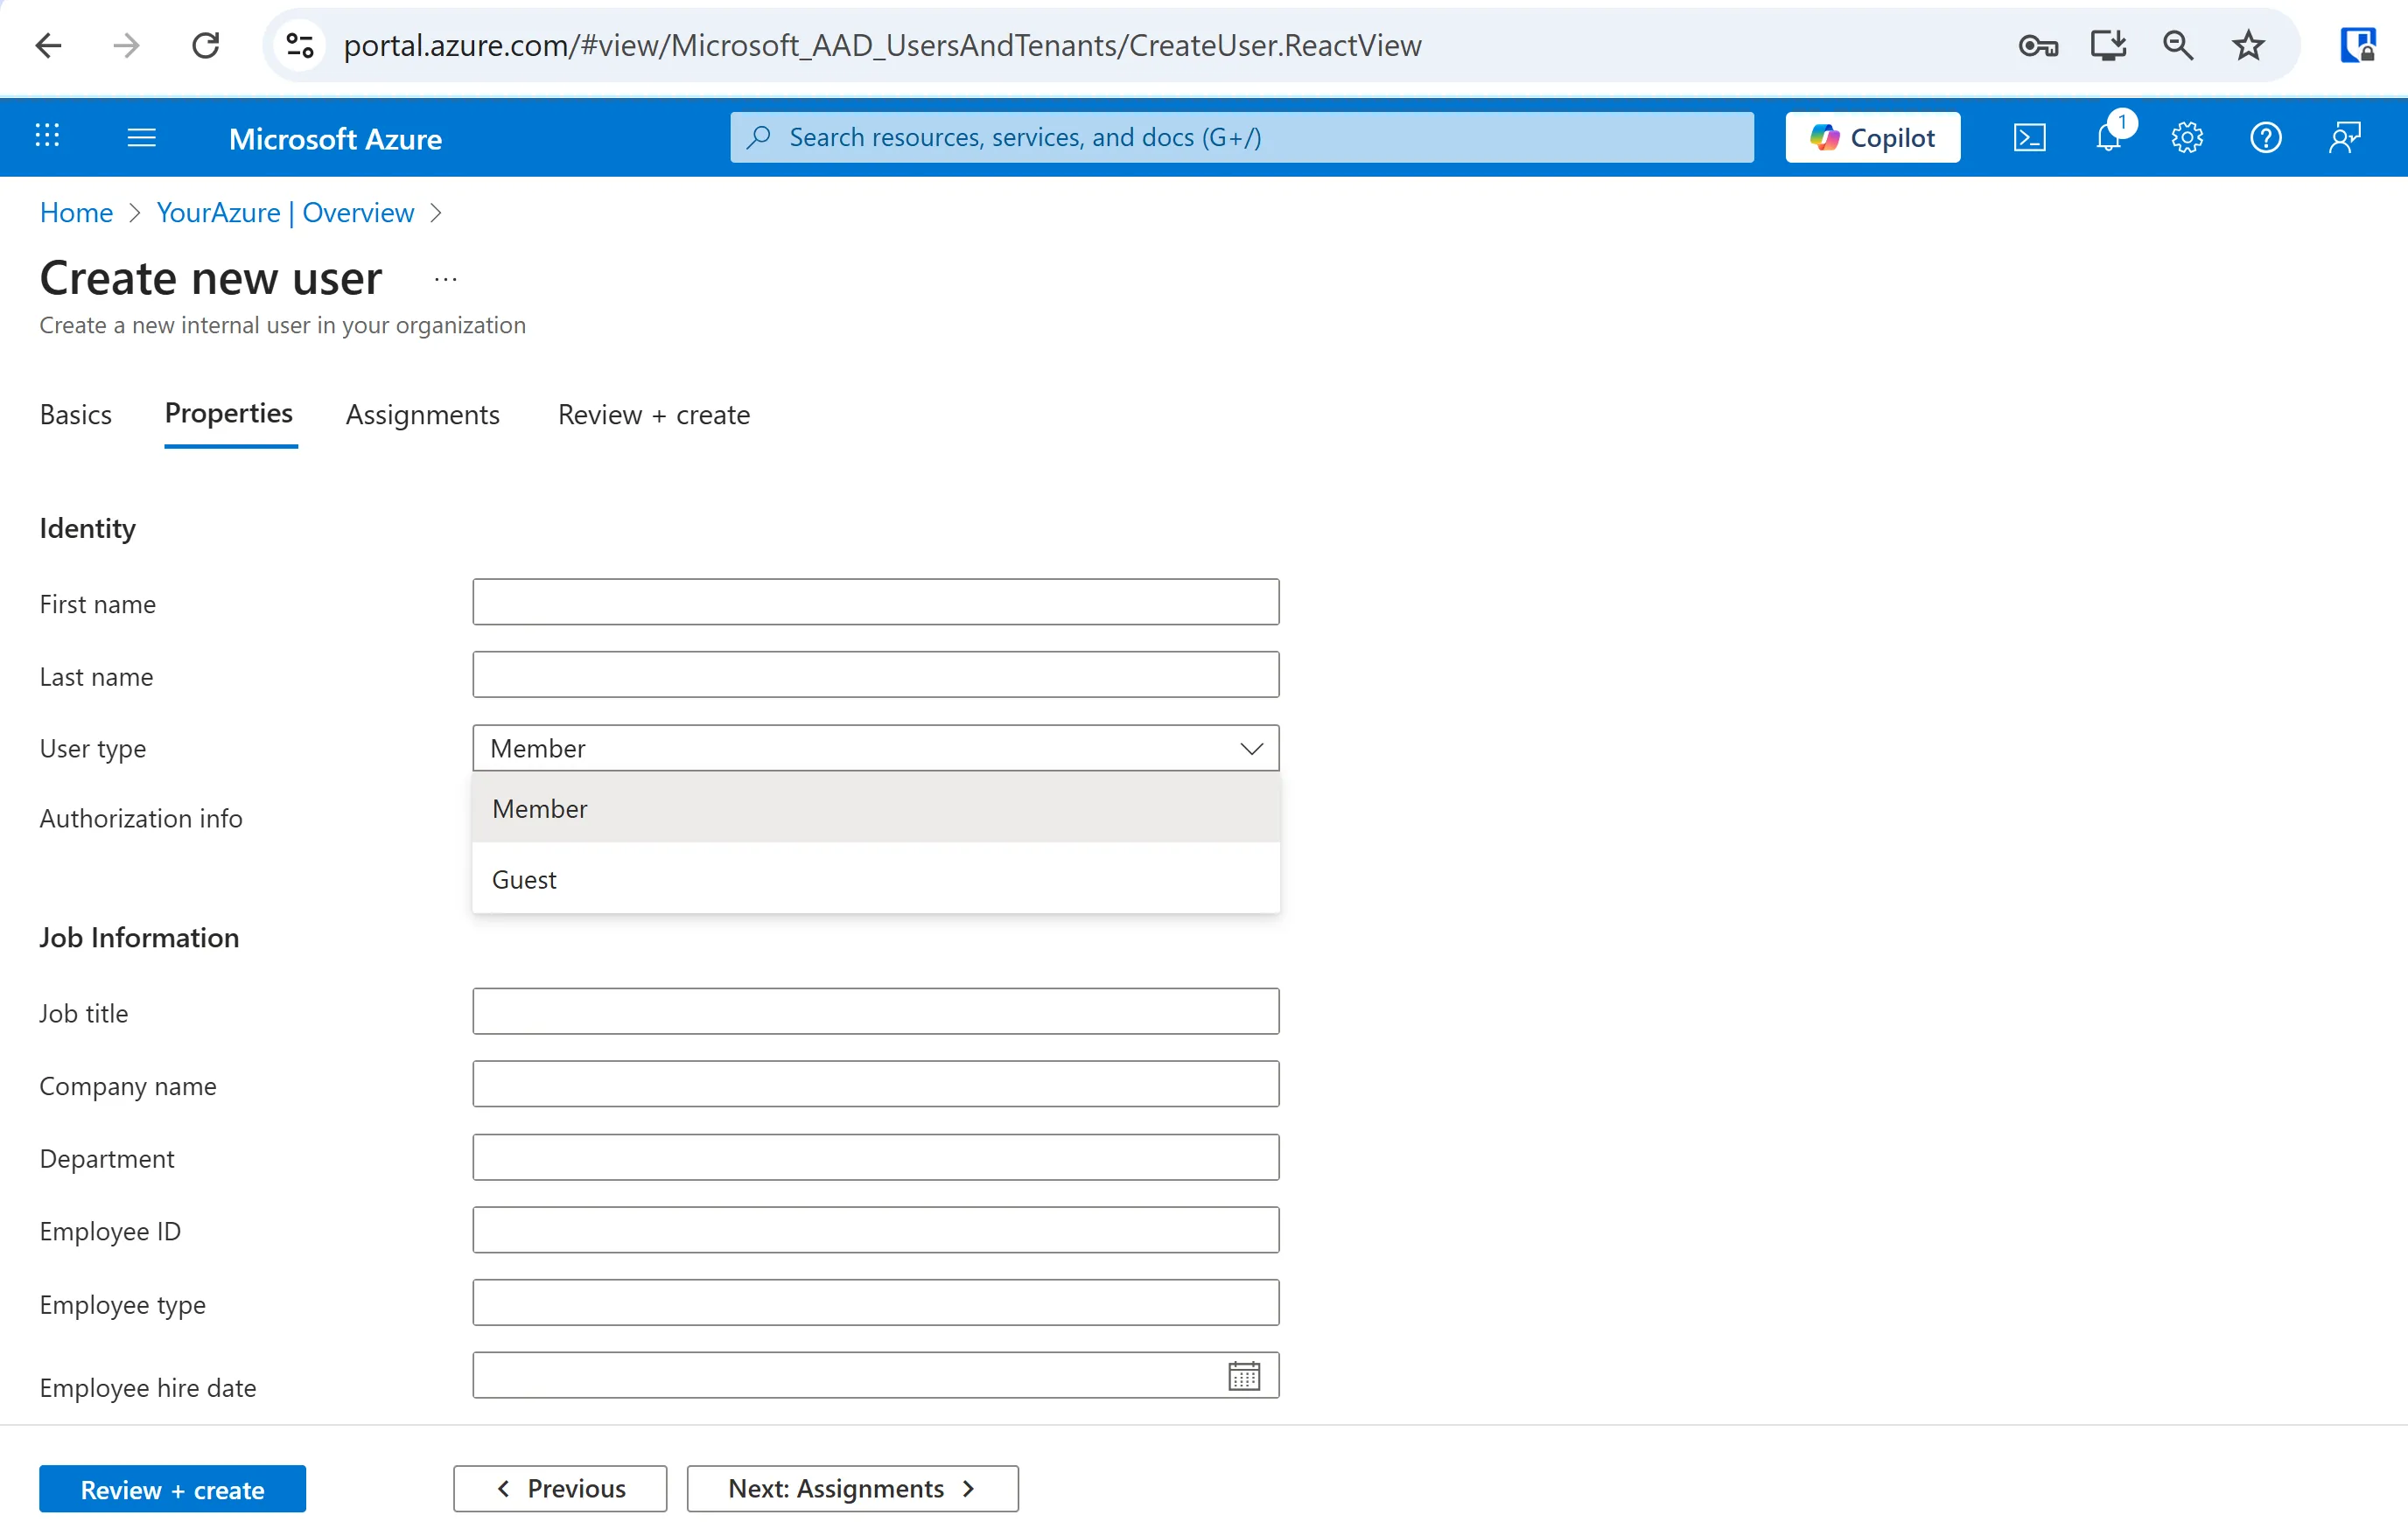
On the Properties tab make sure your User type is set to Member.
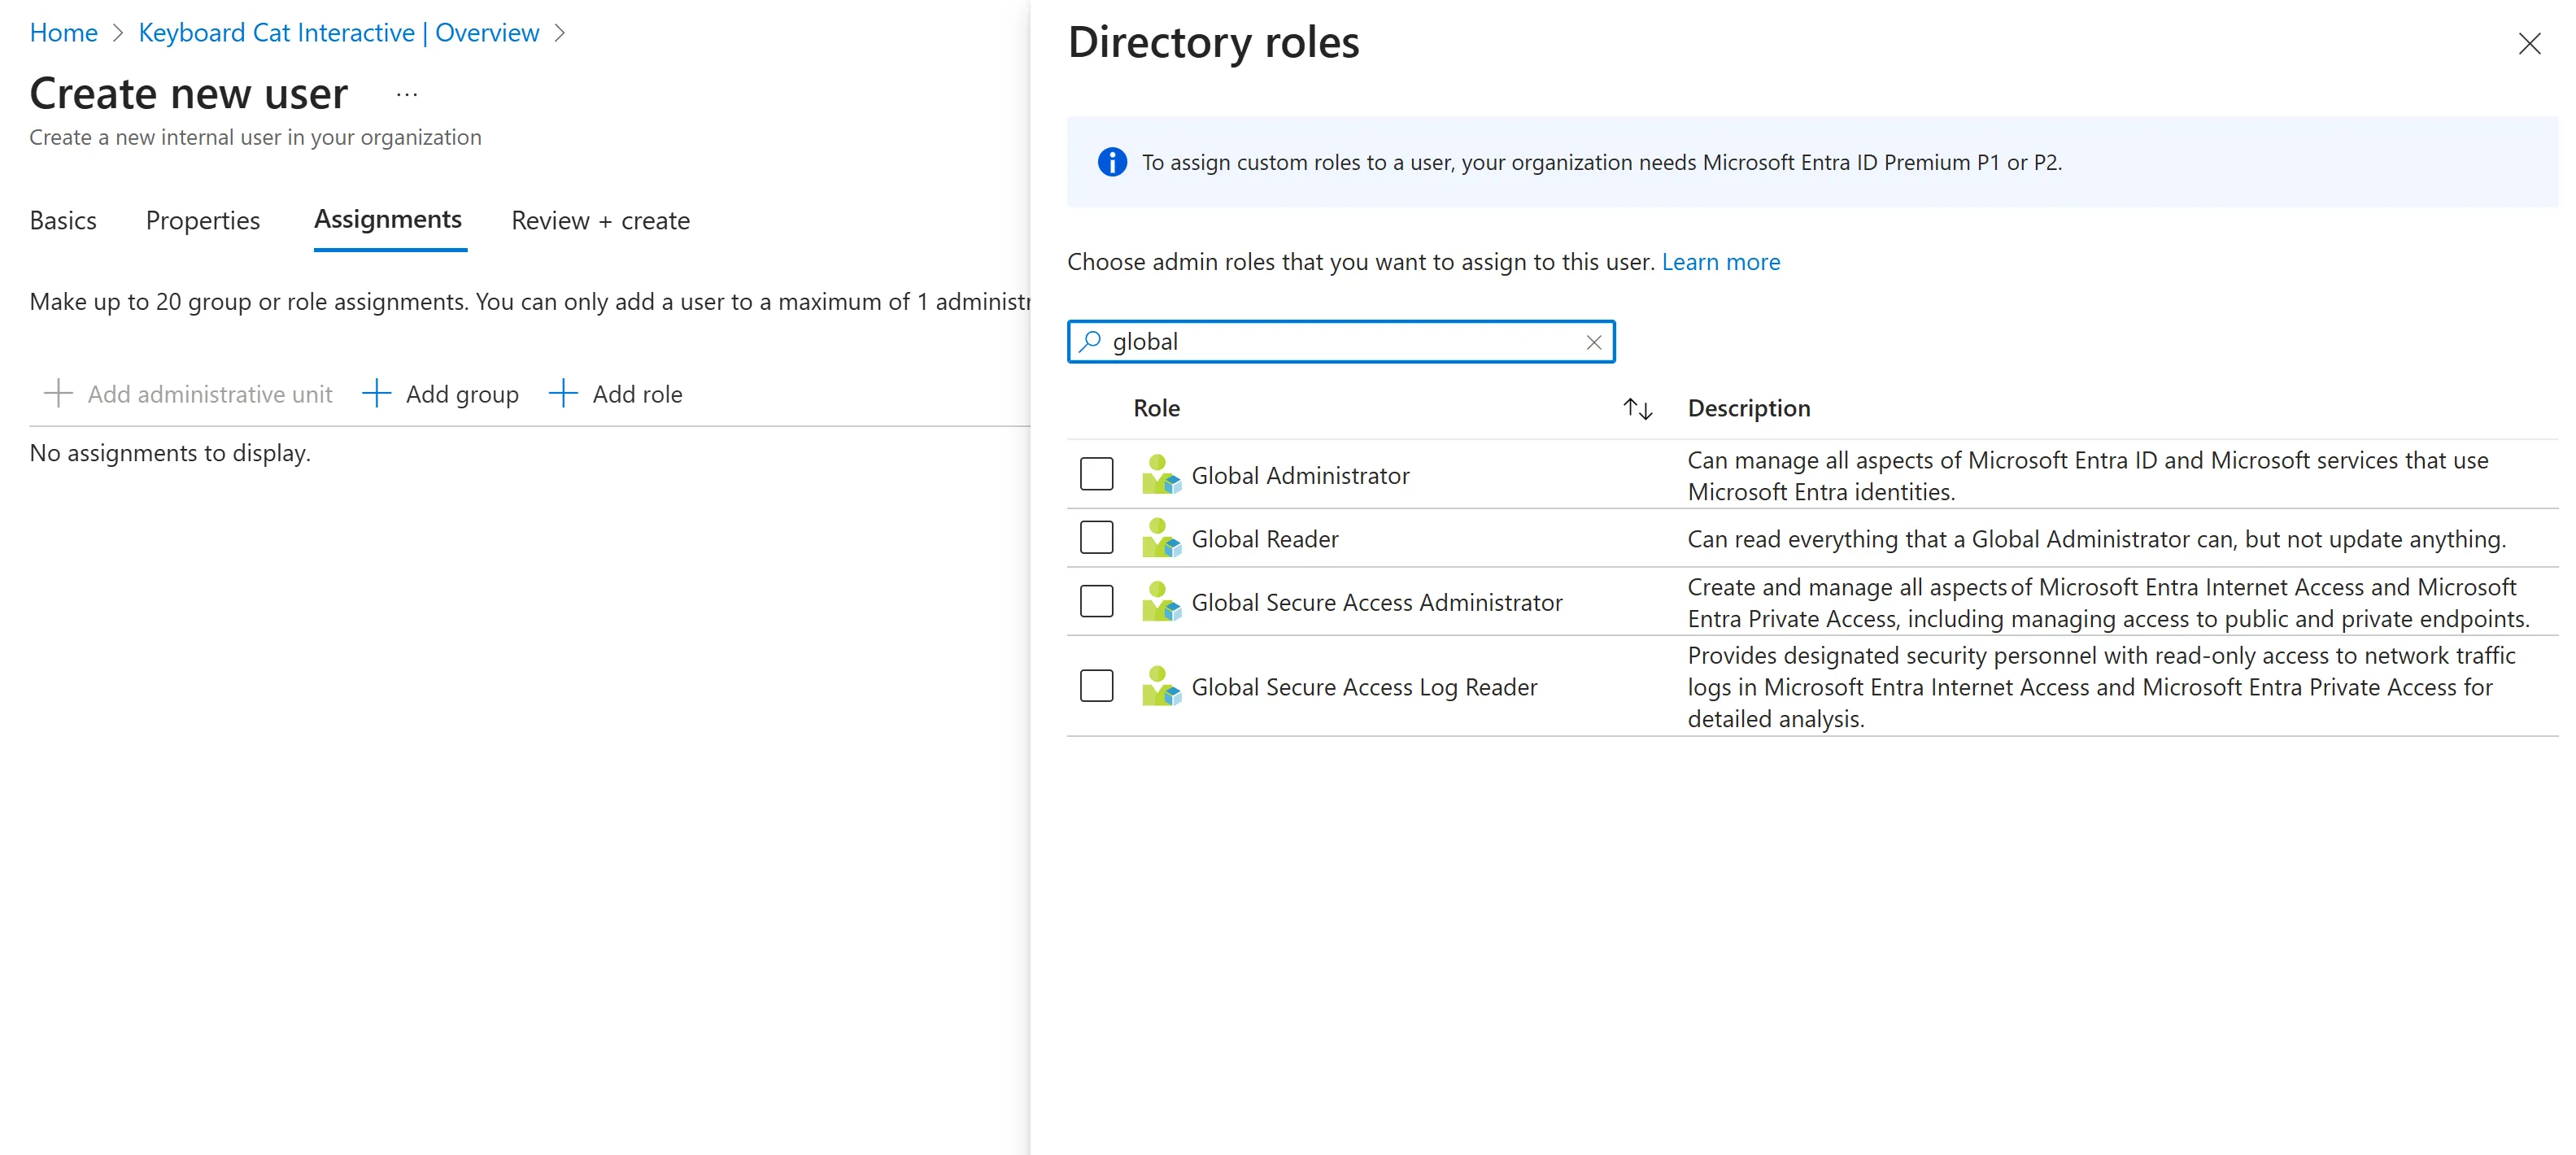
On the Assignments tab make sure you add role as Global Administrator.
NOTE: Make sure to connect to your Azure to rIDE with this email.
Add Environment Details
Section titled “Add Environment Details”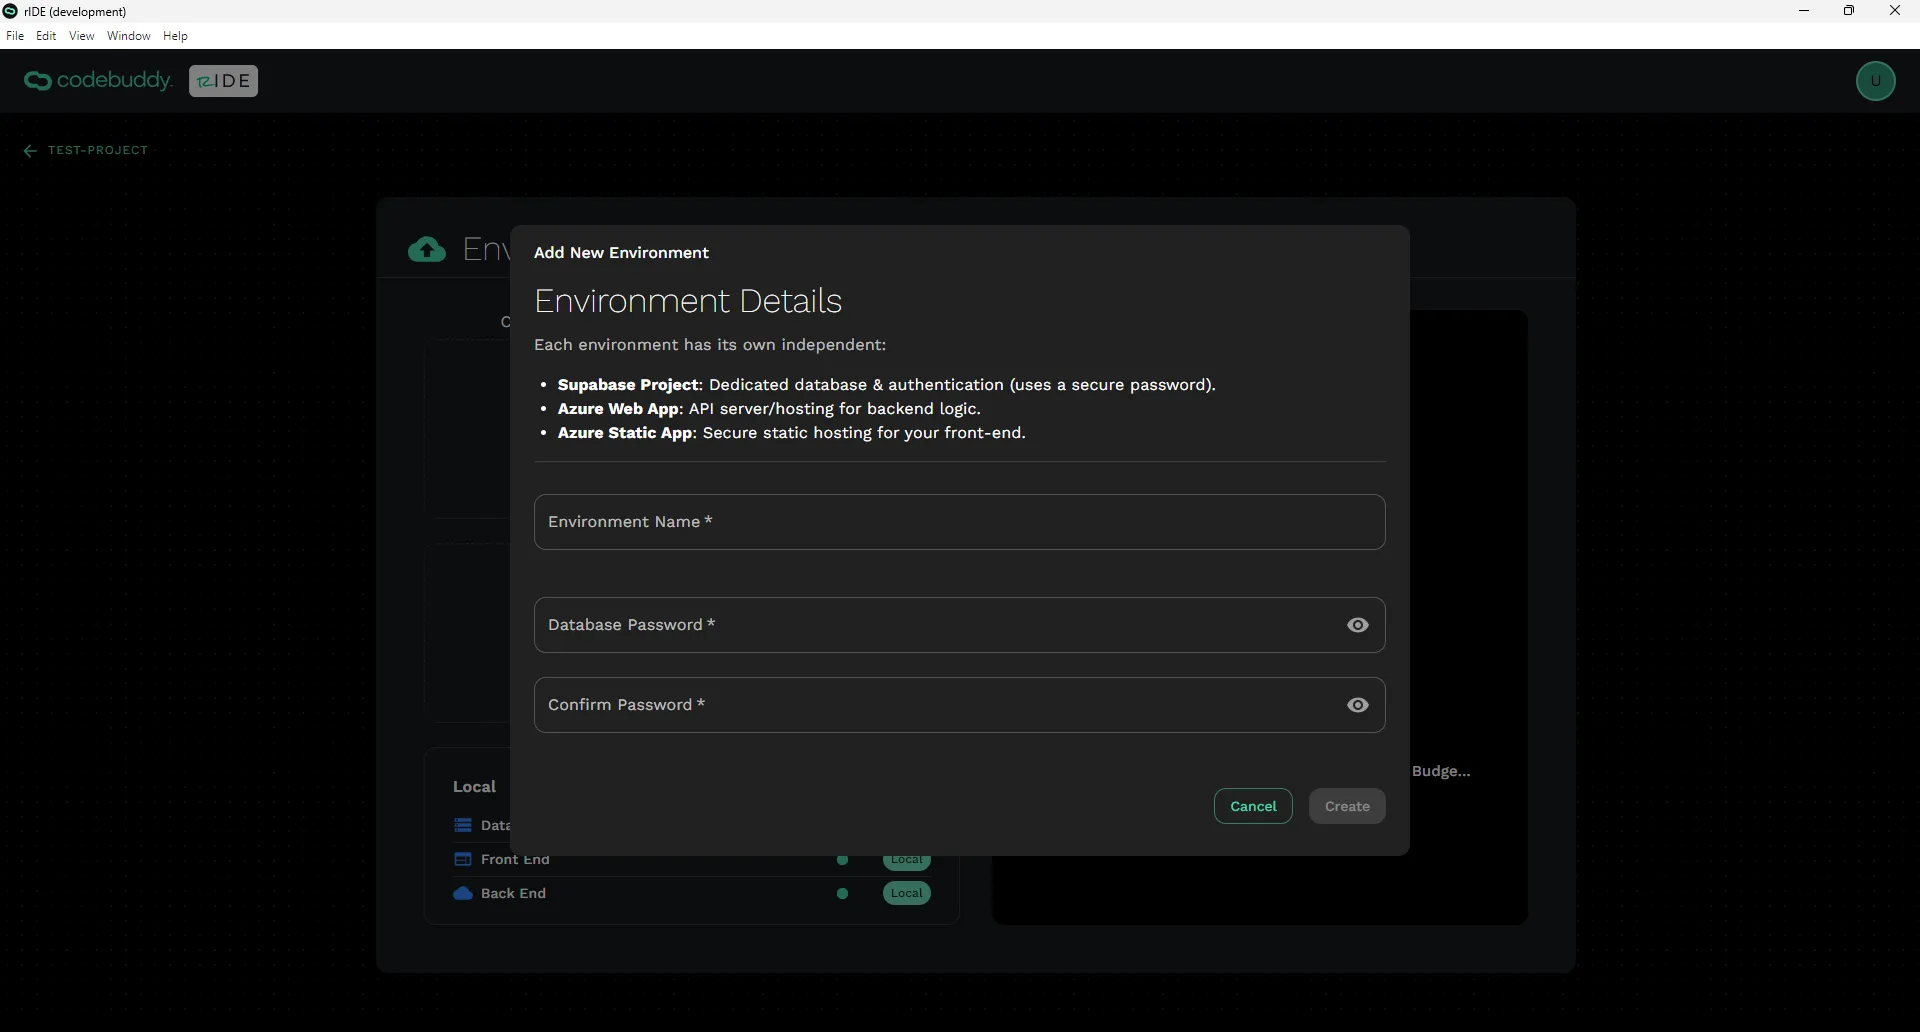
Give your environment a name like Test, Develop, Live, or Production.
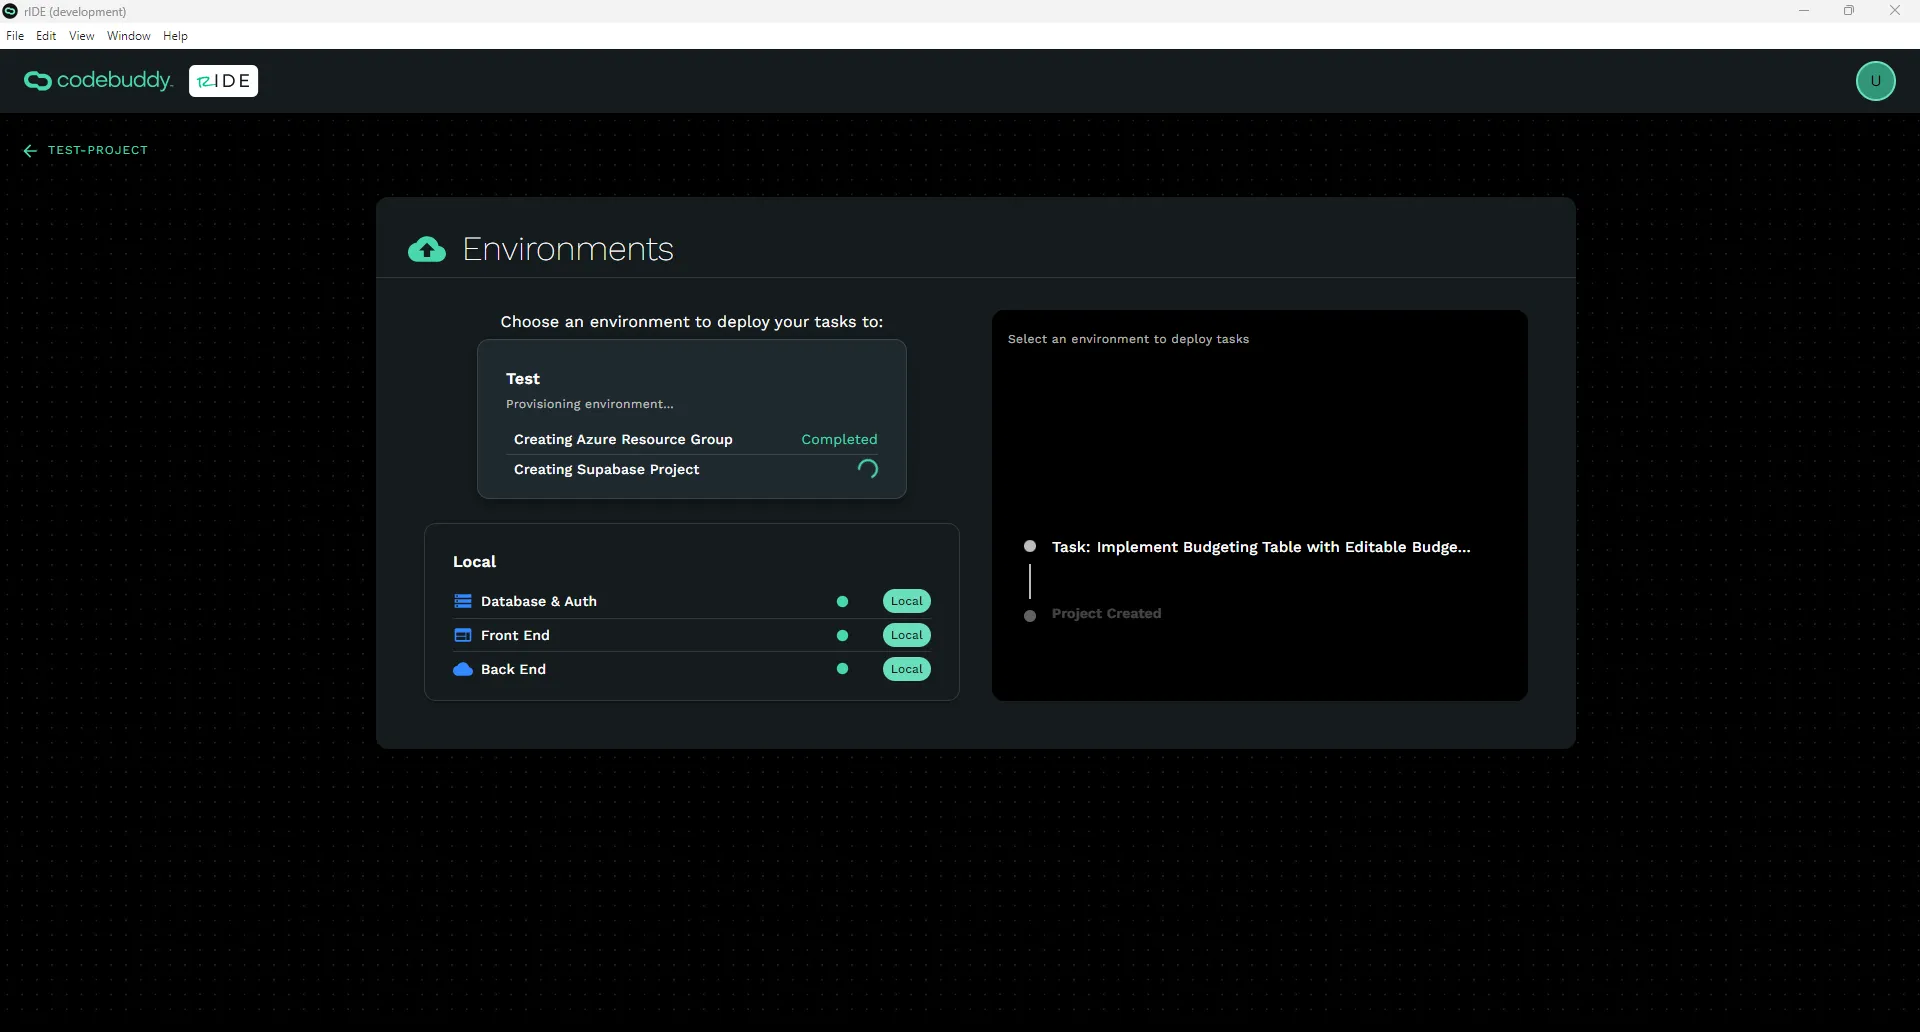
Wait for the environment to complete building.
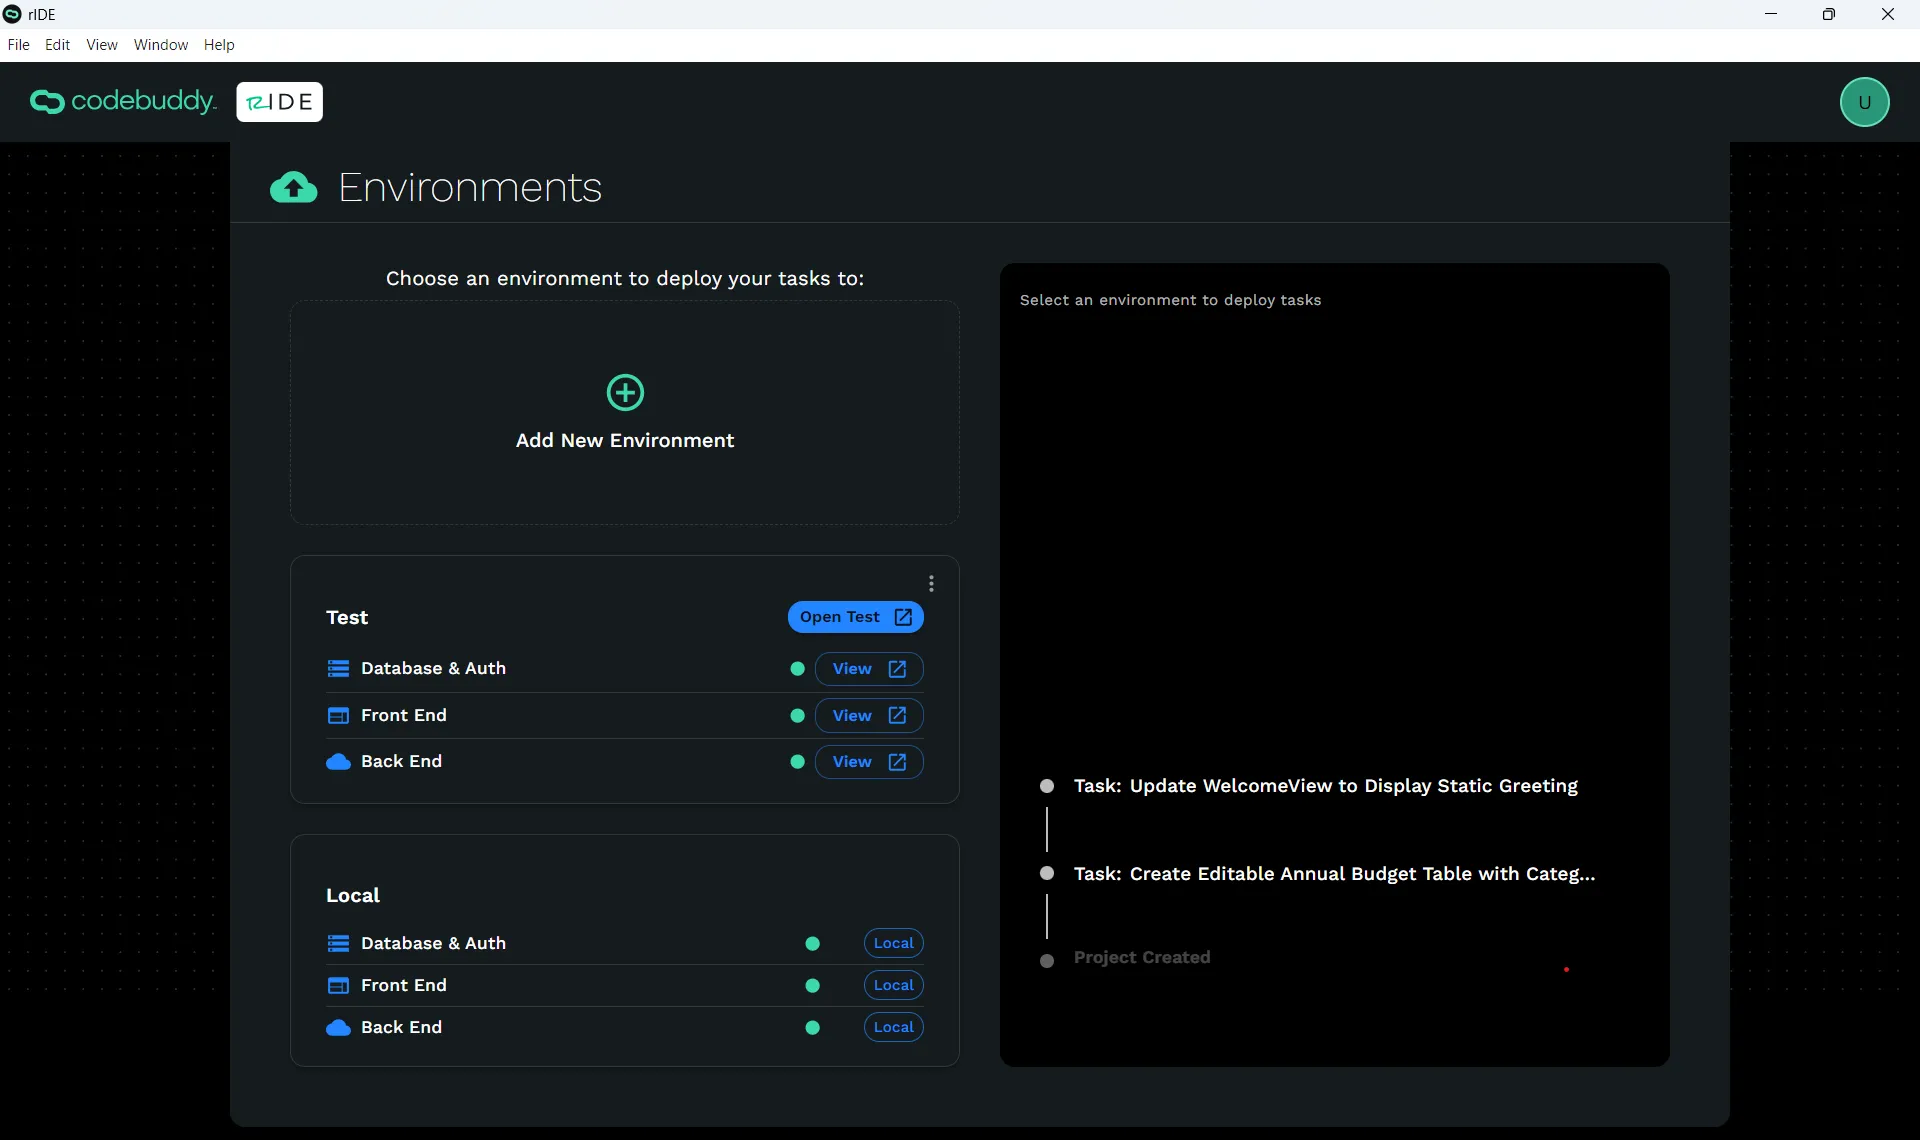
When your environment is built you have the following options:
- Click the stacked elipse to view and edit the environment configs. Avoid making any changes to these values unless absolutely necessary.
- Click Open Test to view your app via the newly created URL. Note: You will not see your published code until you click on the environment on the left and click on the task on the right and deploy changes.
- Click View next to Database & Auth to go to Supabase.
- Click View next to Front End to go to Azure.
- Click View next to Back End to go to Azure.